
A Complete Guide to Creating GitLab CI/CD Pipelines with Node JS

In computer programming language, CI means continuous integration and CD means continuous delivery or continuous deployment. CI/CD streamlines the process of development and deployment by automating the process of testing, building and deploying an application. DevOps teams maintain a continuous process in their software development life cycle (SDLC). Hence CI/CD pipelines are the backbone of DevOps. The CI/CD pipeline is a useful addition for DevOps teams to implement so they may deliver frequent code changes efficiently.
In this article, I’m going to explain how to set up CI/CD pipelines into GitLab using the programming language node JS. Before moving further, please read the prerequisites:
Prerequisites
For this tutorial, I assume that you have the following:
The latest stable Node.js installed for development.
A git installed for push and pull to GitLab.
A GitLab instance with an available runner able to run the docker commands.
A Docker registry to push and pull containers to and from docker. Remember that you might need your own docker configuration to run a registry.

Create Node JS Backend Application
The first step is to create an application using Node.js. In addition, the server is also using Express— it is for creating REST APIs. Here, the HTTP request simply returns, “Hey, how are you?”
Setup application
First, set up the directory and create a JS file in it. Run the following commands:
> mkdir firstApp> cd firstApp> touch index.jsNow, for node JS, we use a package manager like npm. So, before using it, we need to create a package.json file by running a command:
> npm init -yHere, if you don’t include -y, then you’ll need to go through each step manually. Now, you can include any dependency into the project like Express:
> npm install --save expressAfter running this command, you will be able to see one more directory inside firstApp named node_modules. Also, package-lock.json will have also been created. Node_modules is where all project dependencies will be stored locally.
Create API
Now, the main part is to create an API that will return some output when it is called on. I have referred to express doc example and modified it a bit. Open the file named index.js and write the given code:
const express = require('express') // Import express npmconst app = express() // instantiate an express appconst port = 3000 // Specify the port on which the HTTP call will listenapp.get('/', (req, res, next) => res.send({status: 200, data: 'Hey, how are you?'})) // Define a routeapp.listen(port, () => console.log(`Example app listening on port ${port}`))Now the last step is to run the application. Punch in the given command:
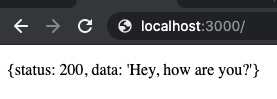
> node index.jsNow, if you hit localhost:3000/ in your browser or call GET API using postman, you will see it return {status: 200, data: 'Hey, how are you?'}, which means your app is running fine.
Docker Configuration
Docker is useful for making your product work in the production environment. In the first step, you saw your app running find in your local machine. A docker container will ship your app to production.
The above app can be containerized using Docker. For this, like NPM, you need one more configuration file (aka Dockerfile) to specify the containerization configuration. So, in this section, I follow the NodeJS guide to application dockerization.
Like package.json manages dependencies of NPM, here we need to create a docker file that helps create a docker container image. To create an image of the node app, we first need to create a file named Dockerfile in the root directory of the app and write the given command:
# The image is built on top of one that has node preinstalledFROM node:12# Create app directoryWORKDIR /usr/src/app# Copy all files into the containerCOPY . .# Install dependenciesRUN npm install# Open appropriate port EXPOSE 3000# Start the applicationCMD [ "node", "index.js" ]Here, we need to take care of node_modules because each time a docker file executes, it will copy all modules. So, to prevent it, create .dockerignore file in the root directory and write just:
node_modulesThus, now it will ignore node_modules.
GitLab Configuration
Now your app is running with Docker. As a final step, you need GitLab configuration to run a pipeline on GitLab. For that, you need to create a file named .gitlab-ci.yml. It will contain all the deployment-related configurations. Here, I choose the deployment server to be AWS EC2. Create a file and write a code as given:
image: yourRepo/docker-builder:latestvariables: dockerTag: '$CI_BUILD_REF' DOCKER_REPO: yourRepo IMAGE_BASE_NAME: test1 IMAGE: $EVISTA_DOCKER_REPO/$IMAGE_BASE_NAME:$CI_BUILD_REF CONTAINER_NAME: 'test-pipeline' TARGET_DIR_STAGE: /srv/docker/staging/test1 TARGET_DIR_PROD: /srv/docker/prod/test1before_script:- echo $dockerTag- echo $DOCKER_CERT > cert.ca- eval $(ssh-agent -s)- ssh-add <(echo "$ID_RSA")- mkdir -p ~/.ssh- '[[ -f /.dockerenv ]] && echo -e "Host *\n\tStrictHostKeyChecking no\n\n" > ~/.ssh/config'build: type: build tags: - docker-in-docker-pure-builder script: # build test images - docker build -t $IMAGE . only: - productiondeployToAWS: type: deploy variables: RELEASE_IMAGE: $DOCKER_REPO/$IMAGE_BASE_NAME:stable DOCKER_COMPOSE_CMD: cd $TARGET_DIR_PROD && docker-compose tags: - docker-in-docker-builder script: # tag the final image (the previous test image is built upon the test image file) - docker tag $IMAGE $IMAGE - docker --tlscacert cert.ca push $IMAGE # tag the full image as lastest and push it - docker tag $IMAGE $RELEASE_IMAGE - docker --tlscacert cert.ca push $RELEASE_IMAGE # deploy the images - ssh user@someserver.com -p2224 "docker pull $RELEASE_IMAGE" - ssh user@someserver.com -p2224 "${DOCKER_COMPOSE_CMD} stop" - ssh user@someserver.com -p2224 "${DOCKER_COMPOSE_CMD} up -d" only: - productionPush your code to GitLab
Now everything is ready to build and deploy on the server. You just need to push your code to your respective GitLab account using the given commands:
> git init> git remote add gitlab http://<gitlab url>/<username>/my-repo> git add .> git commit -m "Checking CI/CD"> git push origin productionIn addition, you can store your private data like your server SSH key, docker username and password into GitLab for future use. In your GitLab repo, go to setting > CI/CD (on the left sidebar). You will be able to see the environment variables section.

Using this you can add multiple variables in the same repo. You can use these variables in the .gitlab-ci.yml file like:
DEPLOYMENT_SERVERS = $DEPLOY_SERVERSPRIVATE_KEY = $PRIVATE_KEYOnce you push your code, the first of the two stages, i.e build, will execute. It will build the docker file using the Dockerfile. One thing you should also know is that, in gitlab-ci.yml, we specify production branch like this:
only:- productionThis means it will build the trigger only if you push your changes to the production branch. After the build, the next step, i.e. deployToAWS, will be executed. It will finally deploy your code to the server (here, EC2) and you will see a green ‘passed’ indication in the first column:

Your overall process is complete here. From now onwards, you will just have to push the latest changes to their respective branches and, once it receives the changes, the pipeline will automatically start.